How to Connect Cricut Explore Air 2 to Computer Wirelessly?
Hi there! I know you are here to get information on how to connect Cricut Explore Air 2 to
computer. It’s been a while since I started creating projects with my
Cricut cutting machine. Here, I can assist you with some common questions that
you have in your mind.
The first step in using a Cricut machine is to set
it up correctly on a computer. Although Cricut models are compatible with all
operating systems, I will only focus on the connection process on a Windows and
Mac computer.
Don’t think too much, and let’s learn the easy ways
to connect your Cricut machine to a computer with me. I know you’ll find my
blog really helpful at the end. So, let’s begin.
How to Connect Cricut Explore Air 2 to Computer?
I will share two different methods for connection,
one for Windows and another for Mac. One more thing that I’ll only tell you
about the wireless connection. So, let’s go through the steps for each.
For Windows
If you want to connect your Cricut Explore machine
to Windows, let’s check the steps below:
- To get started, turn on your Cricut product.
- Then, keep your machine at least 10-15 feet away from the
Windows computer.
- On your desktop computer, head to the Start menu.
- After that, hit the Settings
button (a gear-like icon).
- On the following screen, hit the Devices option.

- Next,
verify if the Bluetooth is ON or not. If not, turn it on.
- Afterward, hit the Add
Bluetooth or other device option.

- Now, click on the Bluetooth
option and let your computer find your machine.
- Lastly, select the Cricut model and continue with the setup
procedure.
That’s how to
connect Cricut Explore Air 2 Bluetooth to a computer. Now, let’s take
another step.
For Mac
If you’re a Mac user, the steps for a Mac would be
slightly different than Windows. Let’s check the steps below:
- First of
all, make sure that your Mac computer is ON.
- Then, install your Mac at least 10-15 feet away from your
machine.
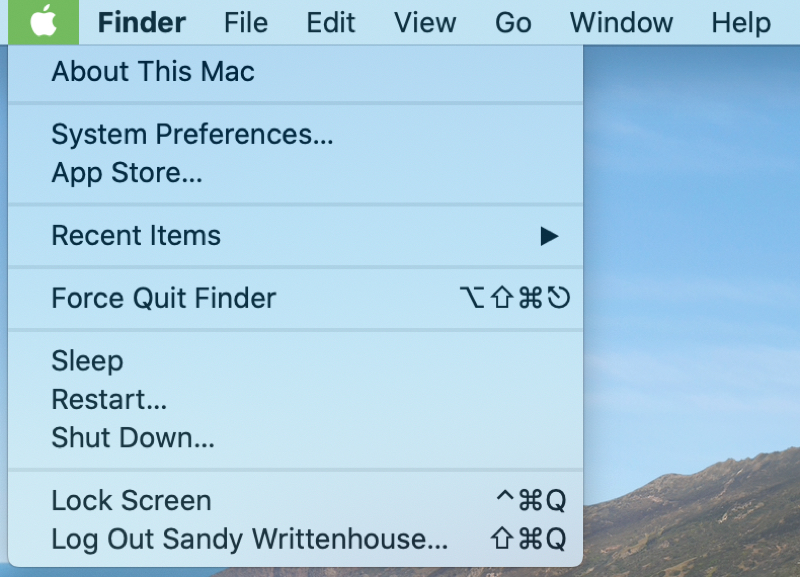
- After that, hit the Apple
menu and select the System
Preferences option.

- Now, you
can locate the Bluetooth option
on the screen.

- Next,
check if the Bluetooth option is ON; if not, turn it on.
That’s it for the wireless connection. You know how to connect Cricut Explore Air 2 to
computer Bluetooth.
How to Connect Cricut Design Space to Your Computer?
To connect your Design Space to the Cricut cutting
machine, you must download this software on your device. To get this app,
follow the steps below:
For Windows
You can go with the steps here to install the Design
Space software on your Windows computer. Check the steps here.
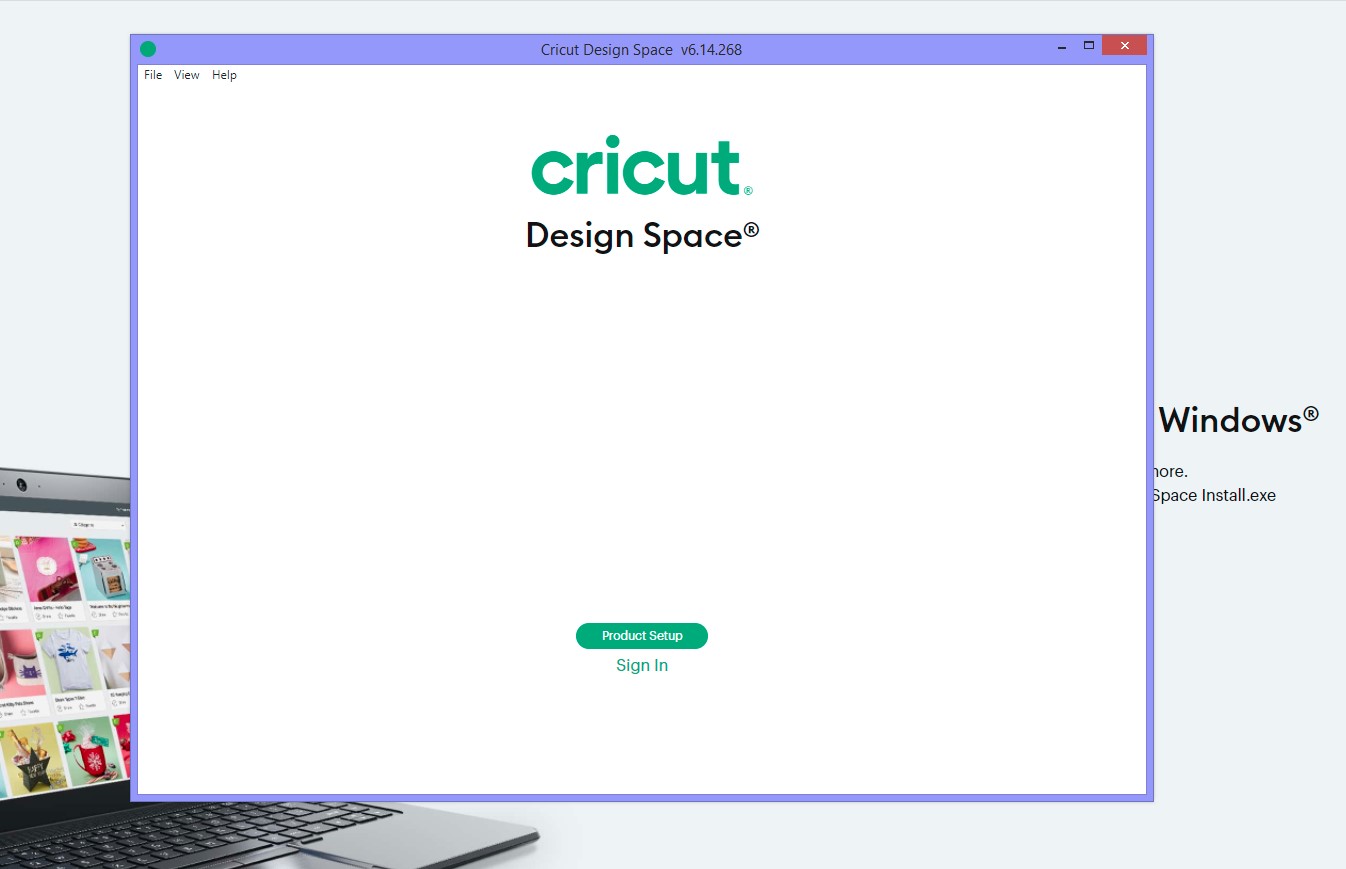
- First of all, launch the internet browser and visit design.cricut.com.
- Then, agree to the Cricut
Terms of Use and hit the Download
button.

- Your screen may slightly change during this time.
- When the software is downloaded, reach the Downloads folder and double-click
on your file.
- After that, an installation window will appear; let it run.
- Next,
use your Cricut ID and password to log in to your Design Space account.

- Now, your software will be added to your desktop.
- Lastly, you can start crafting with your Cricut and
computer.
Finally, you’re ready to enjoy your Cricut software
and use it to create your DIY projects.
For Mac
To connect your Cricut machine to Design Space, you
need to follow the steps given below. Let’s have a look at those steps.
- On your Mac, open the internet browser and search design.cricut.com.
- Then, tick the box to agree to Cricut Terms of Use and hit the Download button.
- After that, select a location to save your software file.
- Now, let the download complete.
- Next, reach to the Downloads
folder and double-click on the file.
- On the following screen, allow the file to be installed.
- When you see the icon on the window, you can drag that icon
to your Applications folder.
- Your Mac computer will ask you to open the application and
select Open to start.

- Now, log in to your Cricut account using the right username
and password.

- Finally, you have the Cricut software on your Mac desktop.
That’s how you can connect your Cricut machine to
the Design Space app and then start working on your projects.
Conclusion
Finally, you know how to connect Cricut Explore Air 2 to computer such as Windows and
Mac. You also get an idea of how to connect your computer to the Cricut Design
Space. A wireless connection like Bluetooth is better for setting up a
connection between your machine and computer. Now, you are all set to start
creating projects you always wanted on the canvas. Also, utilize the amazing
features of Cricut for making DIY projects.
FAQs
Can I Set up My Cricut Explore Air 2 on a Smartphone?
Yes, you can. The method for setting up your Cricut
Explore machine to a mobile phone is pretty simple. You only have to install
the Cricut app on your smartphone. Once installed, you can log in to your
account using the right credentials. Lastly, turn on the machine and connect it
to your smartphone via Bluetooth.
How to Connect Cricut Explore Air 2 to Computer via USB?
To connect your machine to a computer via USB, you
need to follow the steps given below.
- In the first step, you need to install your devices
adjacent to each other.
- Then, connect one end to the USB cable to your machine.
- Now, connect the other end to the computer’s USB port.
- Install the Cricut app on your computer.
- After that, sign in to your account using the right
details.
- Finally, your devices are connected using a USB cable.
How to Connect Cricut Explore Air 2 Bluetooth to Computer?
To connect your Cricut Explore machine using
Bluetooth to your computer, use these steps:
- Make
sure that the Bluetooth option is ON on your computer.
- Choose the Bluetooth
option and allow your computer to find your machine.
- Now, pick your model from the list of devices.
- At last, enter the Bluetooth PIN as “0000” if asked.
- Finally, the machine Bluetooth is connected to the
computer.
Visit - How to Connect Cricut Explore Air 2 to Computer


:max_bytes(150000):strip_icc()/how-to-turn-on-bluetooth-on-mac-66657853-02307c4901a643bda7919b59818aeb63.jpg)
Comments
Post a Comment